ProImage Features |

|

|
|
ProImage Features |
|
|
ProImage Features |
|
|
|
ProImage Features |
|
|
|
|
||
Feature: the ability to resize the Visual Target with the mouse and a Freehand Crop.
The Visual Target System is one of the most powerful features of the ProImage editor. This innovative control lets you give your users a real time representation of the final image they will have when their editing is complete.
The Visual Target System projects a indicator in the viewer on top of the image to be edited. Depending on the size of the target indicator and the amount of screen space available, this will be either a full sized representation or scaled to fit.
When the image is loaded, it is either zoomed to fit the target indicator or zoomed to fill it (your choice).
If the user stops at that point and clicks save - they can see exactly what they will be getting.
Note: If the image is not the same aspect ratio as your target, this may result in a tiny portion of the image being cropped, but this is normal since one of the goals of the Visual Target System is to provide you will full frame (same size) images that do not have white space around them.
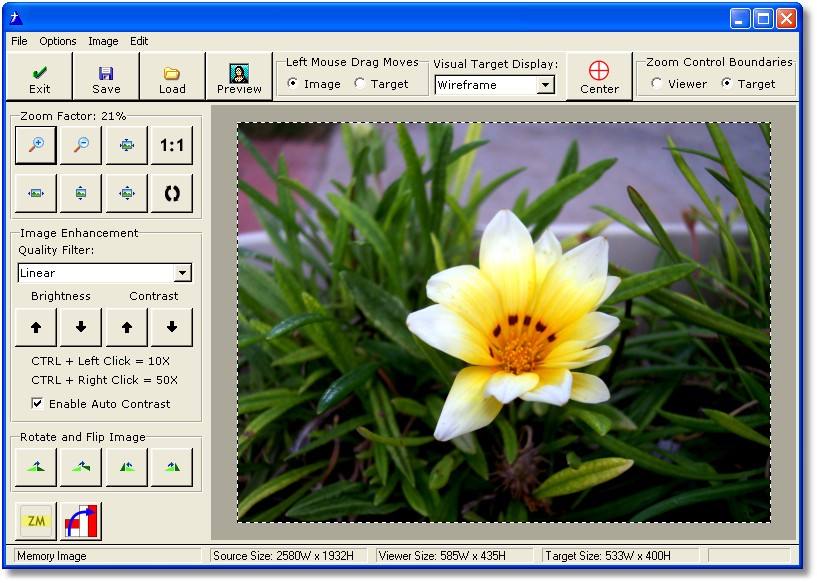
Here is an example of a image as soon as it is loaded into the Visual Target System:
If the user was to click on the image and use the mouse wheel to zoom in (or use the +/- zoom buttons) they might see this:
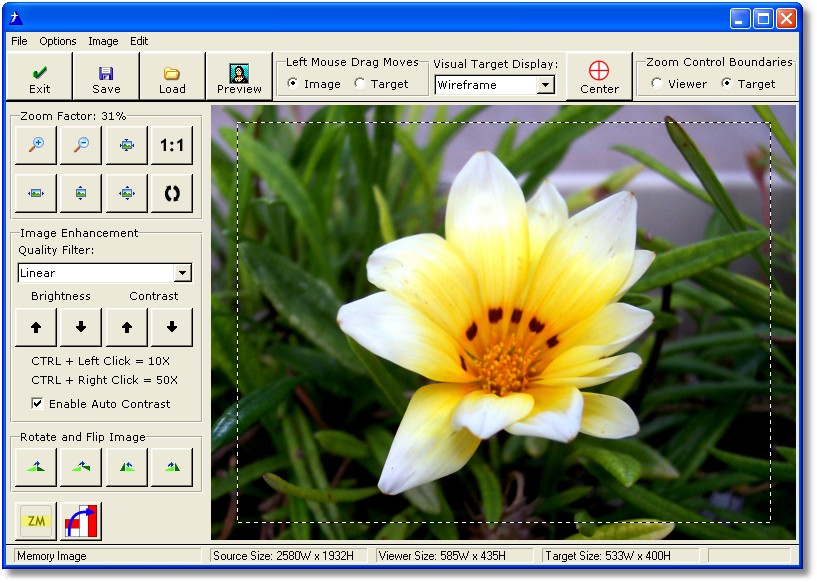
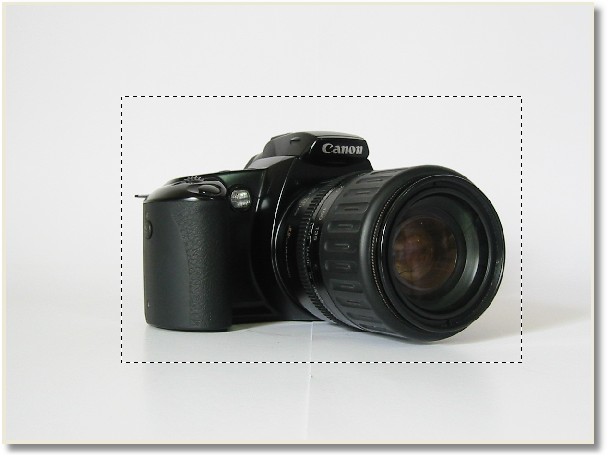
Now the Visual Target System (shown in Wireframe mode here) indicates exactly what portion of the image they would get if they clicked the Save button.
Types of Visual Target Indicators
There are two types of target indicators a Wireframe and a Lens.
The Wireframe indicator displays as a dashed line as shown here:

The Lens indicator displays as a colored semi-transparent block as shown here:
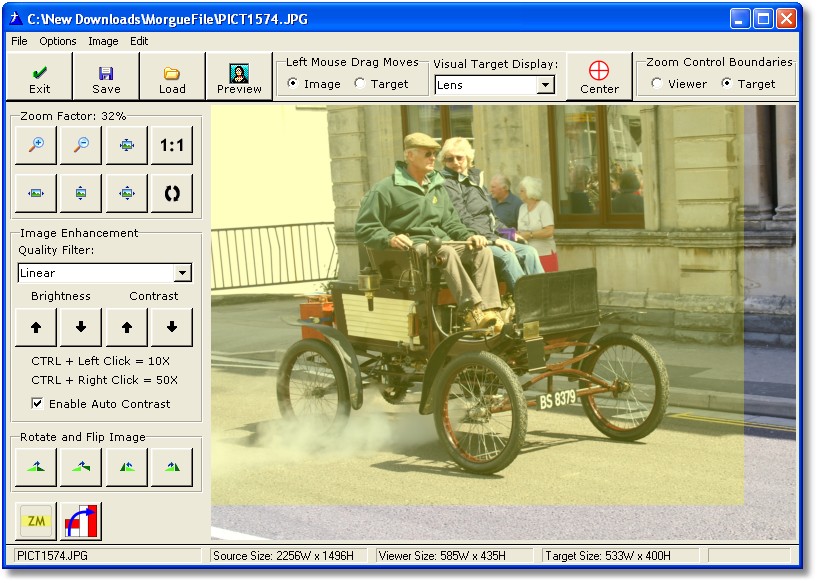
Note: The colored lens is very useful when selecting an area such as a signature from a scanned document.
The user can left-click and drag to move the image behind the target indicator and use either the mouse wheel or buttons to zoom in and out as needed.
They can also change the left mouse mode and move the target indicator around over the image to position it exactly where they want it.
When the user saves the image, ONLY the portion of the image inside the target indicator will be captured.
This is a very effective method of selecting the portion of the image to be used.
Note: the status bar shows the size of the source image, the viewer size and the target size.
Preset Load Options
A really nice feature of ProImage is the ability of the editor to "adapt" to settings that you pass to it. These include being able to automatically show/hide sources where the user can obtain an image.
By default all options are enabled, but you can turn them On/Off using the template or with code at runtime. Any option not enabled is not just grayed out - it disappears!
If you want to use the templates, you will find the options on the SOURCE tab of the ProImage Call Button Settings.

Zoom and Automatic Crop
One fantastic use of the Visual Target System is the ability to easily turn an "average" product photo into a "fantastic" product photo.
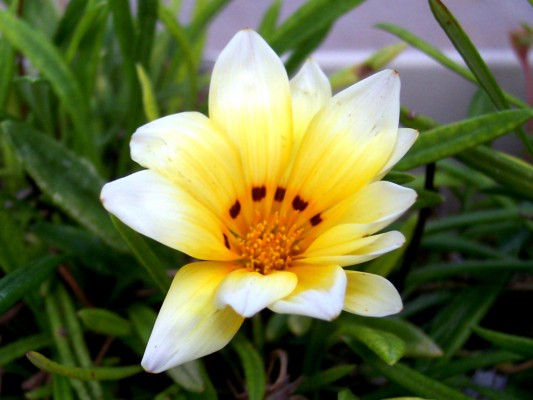
Here is a typical product photo:
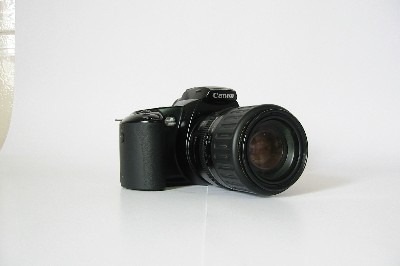
Note the distracting material hanging on the left and the fact that even though the photo was taken with good lighting - it is still not illustrative of what is for sale.
Now by simply rolling the mousewheel forward and dragging the photo to position it in the target system along with two brightness clicks (with automatic contrast enabled) we have this:
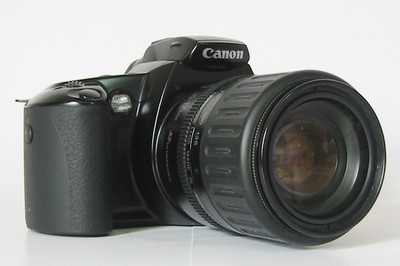
This is an excellent product photo that not only focuses on what is for sale, but also shows the manufacturer and condition.
Equally important is the fact that during the editing process the user is able to see what the final image will look like - as well as what is being cropped away when they click save.
Brightness and Contrast Accelerators
Often digital photos are just too dark - especially when the subject is a dark color. Clicking the increase brightness button will make the image lighter, but if your user has to click it 50 times it is not fun - nor practical.
ProImage lets users hold CTRL and left click brightness or contrast and get a 10x increase (like clicking 10 times) or hold CTRL and right click to get a 50x increase.
Here is a normal photo:
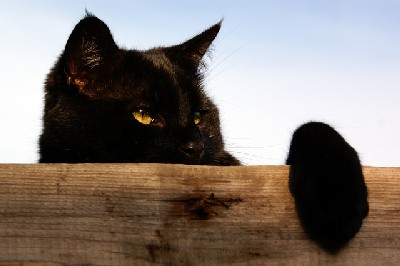
Here is the same photo after simply holding CTRL and right clicking one time:
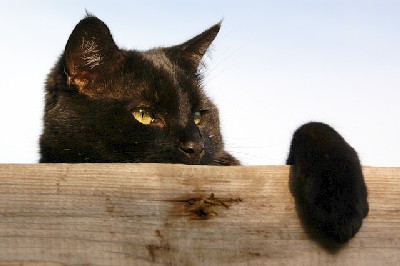
Here it is after adding one more CTRL+Left click
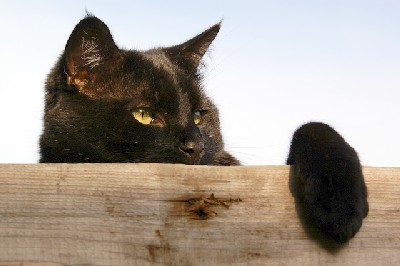
With the automatic contrast enabled the image was balanced after each process.
So with two mouse clicks ( instead of 60 )the user was able to change a dark image into a nice photo.