Migrating from ProImage 1.5 |

|

|
|
Migrating from ProImage 1.5 |
|
|
Migrating from ProImage 1.5 |
|
|
|
Migrating from ProImage 1.5 |
|
|
|
|
||
BEFORE YOU ATTEMPT TO MIGRATE - do two things:
1) Backup your application (more than once for safe keeping)
2) READ this guide
This migration guide is divided into three sections:
Section 1 - Migration Notes
Section 2 - Migration if you do not mind re-importing the ProImage procedures into your application
Section 3 - Migration if you have made extensive modifications to your application and do not want to re-import the TXAs.
Migration Notes
If you are upgrading an existing application from ProImage 1.5 there are a few things you need to consider:
1) If you have not made any changes to the appearance or underlying code in the ProImage procedures, then your upgrade will be easy and you can follow the steps below in SECTION 2.
2) If you have only made cosmetic changes - you should look at the new Demo applications and consider if it is just faster and easier for you follow the steps below in SECTION 2 - then just redo those changes. Note that after you get your app converted (in regards to the embeds below) then future updates to the .ccl file will "flow" into your procedures and you should only have minor changes (such as if new controls are added to the window). If you don't want to redo the cosmetics, then you will be using the steps in SECTION 3.
3) If you have changed the underlying code (especially in the embed points mentioned below) then you will have to look very carefully at the changes we made to the base code and figure out what you need to do to bring your own code into play. This is a very advanced part of the program and we do not expect many developers to have a problem here. Anyone who made changes at this level will most likely have adequate knowledge on how to look at our code and make their code work with it.
Note: The code in these embed points (below) makes up a large portion of the code base that allows the user to resize the Visual Target system. Do NOT change this code unless you are sure of what your doing as it will "break" virtually everything in the way the output images are created. The code behind ProImage's virtual image handling is not trivial.
Differences in the code assembly.
In ProImage 1.5 most of the "working code" was already externalized to the Clarion IDE in a file called PS_ProImage.ccl. This content is pulled into the ProImage procedures with standard Clarion INCLUDE file technology.
In ProImage 1.6 we have move the rest of the serious "working code" out of the main ProImage procedure into the PS_ProImage.ccl file.
However in order to do this, we had to change how the include statements are put in place.
The last 4 embeds where we needed to use INCLUDE files are those that belong to the ImageEx viewer control in the main ProImage procedure.
We can not generate those in place with the ProImage templates, so the INCLUDE statements are hand coded into the embeds - then the content is actually placed in our external file.
Making this change in how the code is delivered will require a one time change to your existing programs, but in the future as we update the .ccl file - the new code will simply "flow" into your application.
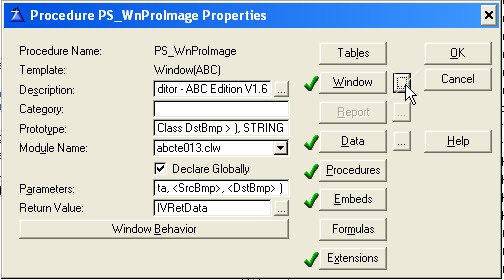
The embed points in question are in the PS_WnProImage procedure. Here is a screen shot of the ABC version:
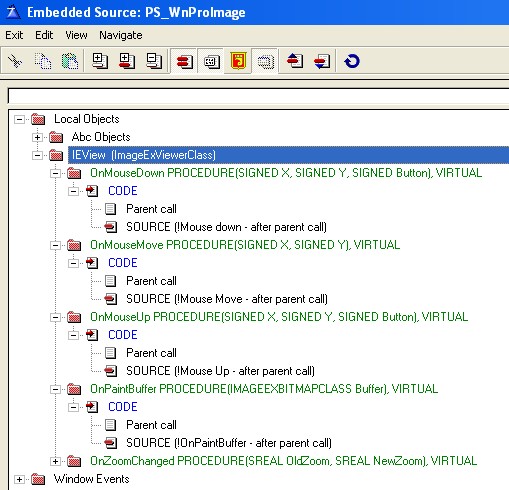
In ProImage 1.5, each of these four embeds had code in them.
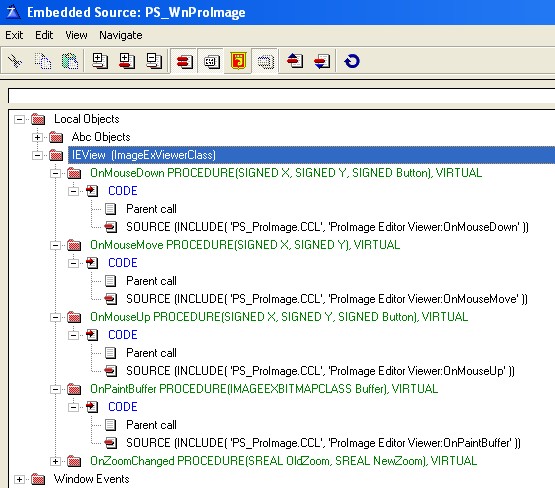
Now each embed will have a single line of code that INCLUDES the code block from the PS_ProImage.ccl file.
The new embeds look like this:
Before you start...
WARNING!!!
BACKUP your application!
BACKUP your application!
BACKUP your application!
We are not responsible for lost code or productivity and can not help you if you have problems and you do not have a backup copy of your application.
Migration if you do not mind re-importing the
ProImage procedures into your application
If you have not changed the look and feel of the ProImage windows, then you can simply use the Application Utility Templates and re-import the ProImage jumpstart TXA into your program
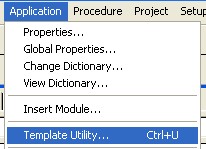
In the IDE, select Application --> Template Utility
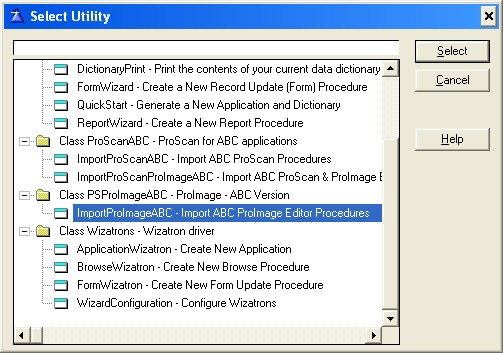
Then select the ABC (or Legacy) version of the ProImage Import
When prompted - click the REPLACE ALL option
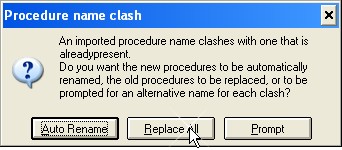
The new ProImage jumpstart procedures will be imported into your application and will replace the existing ones.
Fixing the ABC resize strategy
For some reason, when replacing the procedures, Clarion does NOT correctly import the resize strategy on the ABC versions. This causes a problem when the user maximizes the image editor.
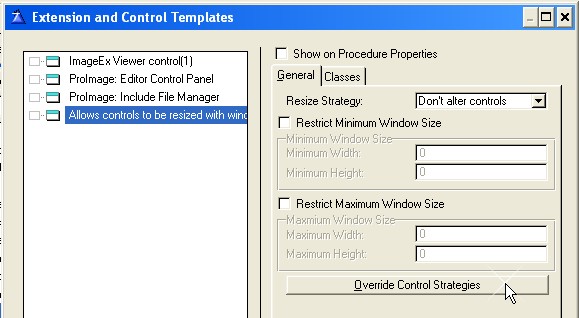
To fix the problem, open the EXTENSIONS window on PS_WnProImage, select the resize template and click the Override Control Strategies button:
If there is a problem - then you will only see ONE entry:
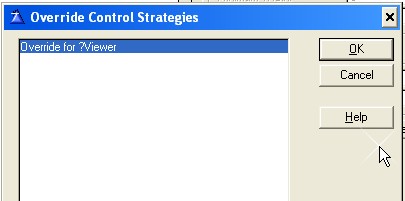
We need to add two other entries to correct the resize problem.
Click INSERT and add the following entry for the ?SheetEditors control:

Set your settings like you see here, then click OK.
Next click INSERT and add the following entry for the ?SheetControls control:
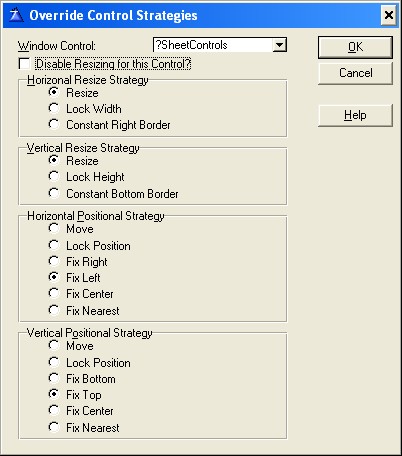
Set your settings like you see here, then click OK.
Then click APPLY and OK to save the changes.
That completes the migration process.
Migration if you have made extensive modifications to
your application and do not want to re-import the TXAs.
If you have made a lot of modifications and decide not to re-import the jumpstart procedures, you will need to make these changes:
1) Change out the embed code
If you have not changed the code in the embeds listed above, then all you need to do is delete the content in them and replace it with the single line of code that calls the INCLUDE file.
Note: These changes are only for the IEView object in the PS_WnProImage procedure.
Here are the embeds and the code that needs to be in them (you can copy/paste from here)
OnMouseDown (AFTER the parent embed)
INCLUDE( 'PS_ProImage.CCL', 'ProImage Editor Viewer:OnMouseDown' )
OnMouseMove (AFTER the parent embed)
INCLUDE( 'PS_ProImage.CCL', 'ProImage Editor Viewer:OnMouseMove' )
OnMouseUp (AFTER the parent embed)
INCLUDE( 'PS_ProImage.CCL', 'ProImage Editor Viewer:OnMouseUp' )
OnPaintBuffer (AFTER the parent embed)
INCLUDE( 'PS_ProImage.CCL', 'ProImage Editor Viewer:OnPaintBuffer' )
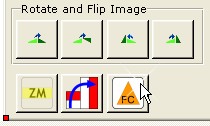
2) Add the button for the Freehand Crop
Open the Window source for PS_WnProImage
Scroll to the bottom of the source view and insert this code (you can copy/paste from here)
BUTTON,AT(57,246,24,24),USE(?ButtonFreeCrop),TIP('Start Freehand Image Crop'),ICON('PS_FreeCrop.ico'), |
#ORIG(?Button24)
below the ButtonRotateTarget entry as shown here:

This will add the Freehand Crop button to the default location.
3) Add the code to the Freehand Crop button
In the Window formatter, select the new Freehand Crop button, right click and select embeds.
In the EventAccepted (AFTER the generated code) INSERT and add this code:
!Set FreeCrop Flag so that when the user does a MouseDown - we reset the target
FLAG:FreeCrop = TRUE
!If we don't have a target - go to Wireframe
IF UPPER( TargetType ) = 'NONE'
TargetType = 'Wireframe'
END !IF
MouseMode = 'Move Target'
DO ROUTINE:UpdateMouseMode
!Reset the target size and position
TargetX = RangeX
TargetY = RangeY
TargetW = 0
TargetH = 0
!Reset BmpTarget size
BmpTarget.SetSize( 0,0 )
!Redraw
IEView.Invalidate()
Save your changes and return to the Window formatter
4) Add the new Alert key
Click the title of the window to select it, then right-click and select Alert
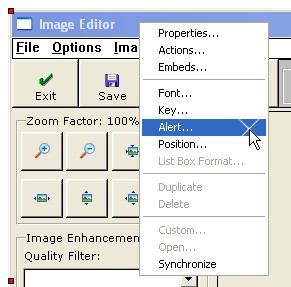
Click ADD and then setup a new alert key for CTRL+A

Click Ok to save your changes.
This will add the alert for the new CTRL+A option to "select all". The code is already in the PS_ProImage.ccl file so there is nothing else to do.
That completes the migration process.