Scan to PDF |

|

|
|
Scan to PDF |
|
|
Scan to PDF |
|
|
|
Scan to PDF |
|
|
|
|
||
The ProImage Scan to PDF feature (also referred to as Scan2PDF) allows you to call the TWAIN interface of your scanner, scan a photo or document using any of it's settings, then automatically create a PDF from the scan without displaying the image in the editor.
Implementation
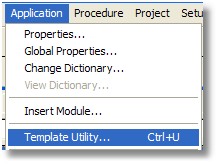
From the Application menu select the Template Utility selector
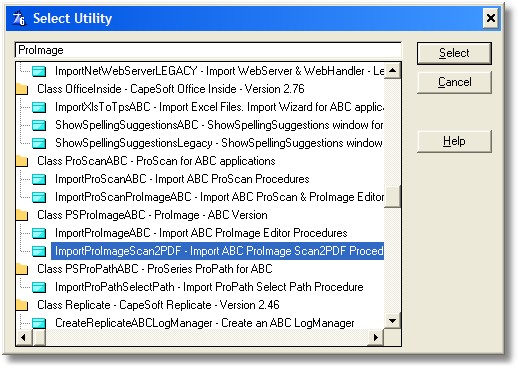
Type ProImage and the selector will jump to the ProImage utility templates.
Highlight the ImportProImageScan2PDF template and click Select.
This will import the ProImage Scan2PDF default procedure into your application tree.

Then just add a button or menu option anywhere in your application where you want to call the Scan2PDF function.

Hint: there is a nice "Scan2PDF" icon included with ProImage that you are free to use
From the button or menu option, simply call the PS_WnProImageScan2PDF procedure:
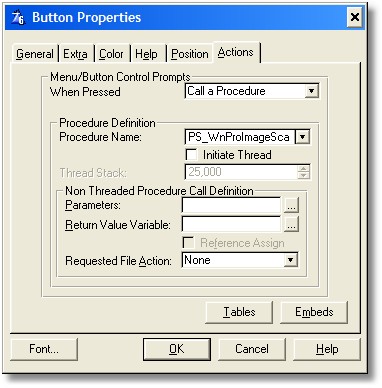
Note: this is a modal procedure window that does NOT have the MDI property set
When the procedure opens you will see this screen:
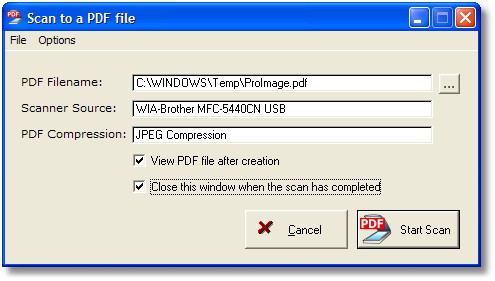
The screen displays the name of the PDF file, the scanner source and the type of compression used to create the PDF.
There are also options to view the PDF after it is created and to automatically close this window after the scan.

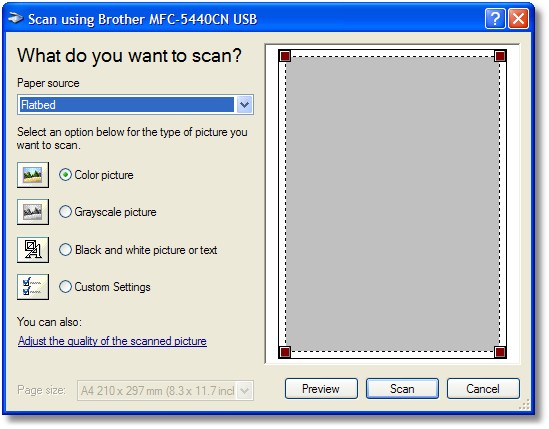
When the user starts the scan, the scanner interface is displayed.
The user can make any selections available (they will vary by device and manufacturer), then start the actual scan with the button on that interface.
Note that there is a similar function in ProScan that allows you to Scan2PDF using scanner profiles for even more flexibility. When you are using a ProScan scanner profile, the user does not have to see the scanner interface.
After the scan is started, this progress bar is displayed:

Then if the automatic close box is not checked the user will see this message:

After the scan is complete the Cancel button becomes the Close button as shown here:
