Adding the Advanced Full Page Preview to your application |

|

|
|
Adding the Advanced Full Page Preview to your application |
|
|
Adding the Advanced Full Page Preview to your application |
|
|
|
Adding the Advanced Full Page Preview to your application |
|
|
|
|
||
To add the Advanced Full Page preview to your application you first need to add the ProImage Global Extension and ImageEx.
The next step is to import the ProImage Video Capture TXA into your application.
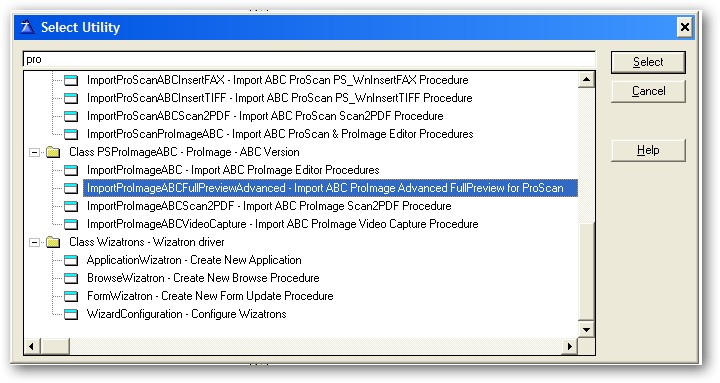
From the Application pulldown menu activate the Utility Template selector:

Type in ProImage and highlight the ImportProImageABCFullPreviewAdvanced item. Then click Select to import the TXA.
NOTE: If your using Legacy templates, it will say "Legacy" instead of "ABC" in the name.
That will import the PS_FullPreviewAdvanced procedure and the two child procedures for Advanced Print and PDF Export into your application.

After adding the Global extensions and importing the PS_FullPreviewAdvanced procedure TXA, the next step is to go to the procedure where you want to call the Advanced preview procedure and add the control to the window.
NOTE: You can also use a #CODE template to call the Advanced preview procedure.
In the Clarion Window Formatter, click the Control Template button (or use Populate --> Control Template) to display the list of control templates. Then type ProImage to move to the correct section of the list.
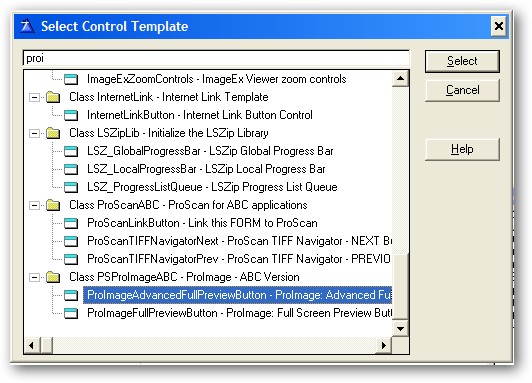
Highlight the ProImageAdvancedFullPreviewButton from the list and click the SELECT button.
This will place the following button on your window:

To set the properties of the call button, right click and select the Action tab. Then you will see this button:
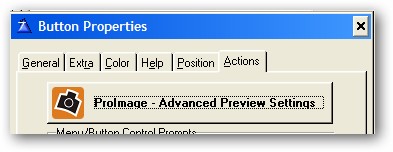
Click the button to open the template settings.

On this template, you can set the following options:
Set the Window title for the Full Screen Previewer - Check this box to enable the Window Title field and this feature.
You can type in a string (in single quotes) or select a VAR with the [...] button. That value will be used to set the Window Title in the full screen previewer.
What to send to the Full Screen Previewer
●ImageEx Bitmap - like the standard previewer, you can use this procedure to also sent the current contents of a ImageEx bitmap (such as IEVIEW.Bitmap) to the Full Page previewer.
Note that this is NOT sending a multipage TIFF if that is what your viewing, but only the CURRENT page.
●Single Image File - this configures the previewer in a fixed mode for single page image files. The buttons and controls (such as page navigation and advanced printing) are hidden and the previewer is configured like the standard previewer.
●Multipage TIFF File - this configures the previewer in a fixed mode for multipage TIFF files. The buttons and controls (such as page navigation and advanced printing) are enabled and the previewer is configured for the advanced features
●Image File - this is the "smart mode" of the previewer. It will use the file extension to determine if it needs to be configured for single page images or multipage TIFF files and automatically adjust itself accordingly.
ImageEx Bitmap Source - this is the name of an ImageEx bitmap (the default is IEView.Bitmap - used as the standard on all our windows)
FileName - the name of the external file to load (or a variable with the same).
File Storage Path - the path to where the external file is to be loaded from (or a variable with the same). If no path is provided, the application folder is assumed and used to create a full path to the image file,
NOTE: For performance reasons, this previewer expects the file to be external - NOT in a blob.
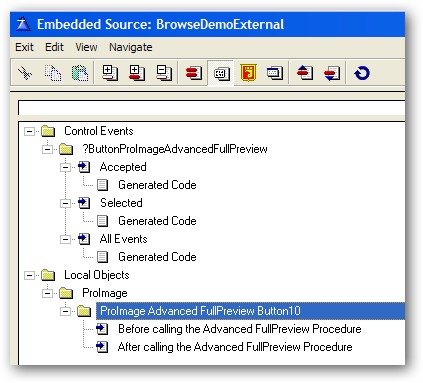
However there are embed points BEFORE and AFTER the button so that you can extract a file from a blob into a temp filename (using the standard Clarion BlobToFile method) and then delete it with the REMOVE command after the previewer closes.